
Buckets
Create a bucket by picking a name, region, visibility, and storage tier — visibility and tier can change later, region can't.
A bucket is created with a name, a region, a visibility, and a storage tier. Region is fixed for the life of the bucket; visibility and tier can both be changed later from the bucket's Settings tab.
Create a bucket
- 1Click New bucketFrom the Object Storage dashboard, click New bucket to open the creation form.
- 2Name itBucket names are lowercase, 3–63 characters, letters/numbers/hyphens only — no dots, and it can't start or end with a hyphen. The console lowercases what you type automatically and validates the name live as you go.
- 3Pick a region and visibilityChoose which region the bucket lives in, and whether it's Private (default) or Public read — see Public access for what Public read means before choosing it.
- 4Pick a storage tierEach tier shows its space and monthly price as a selectable card, tagged Insufficient balance if your current credit balance can't cover it — see Tiers.
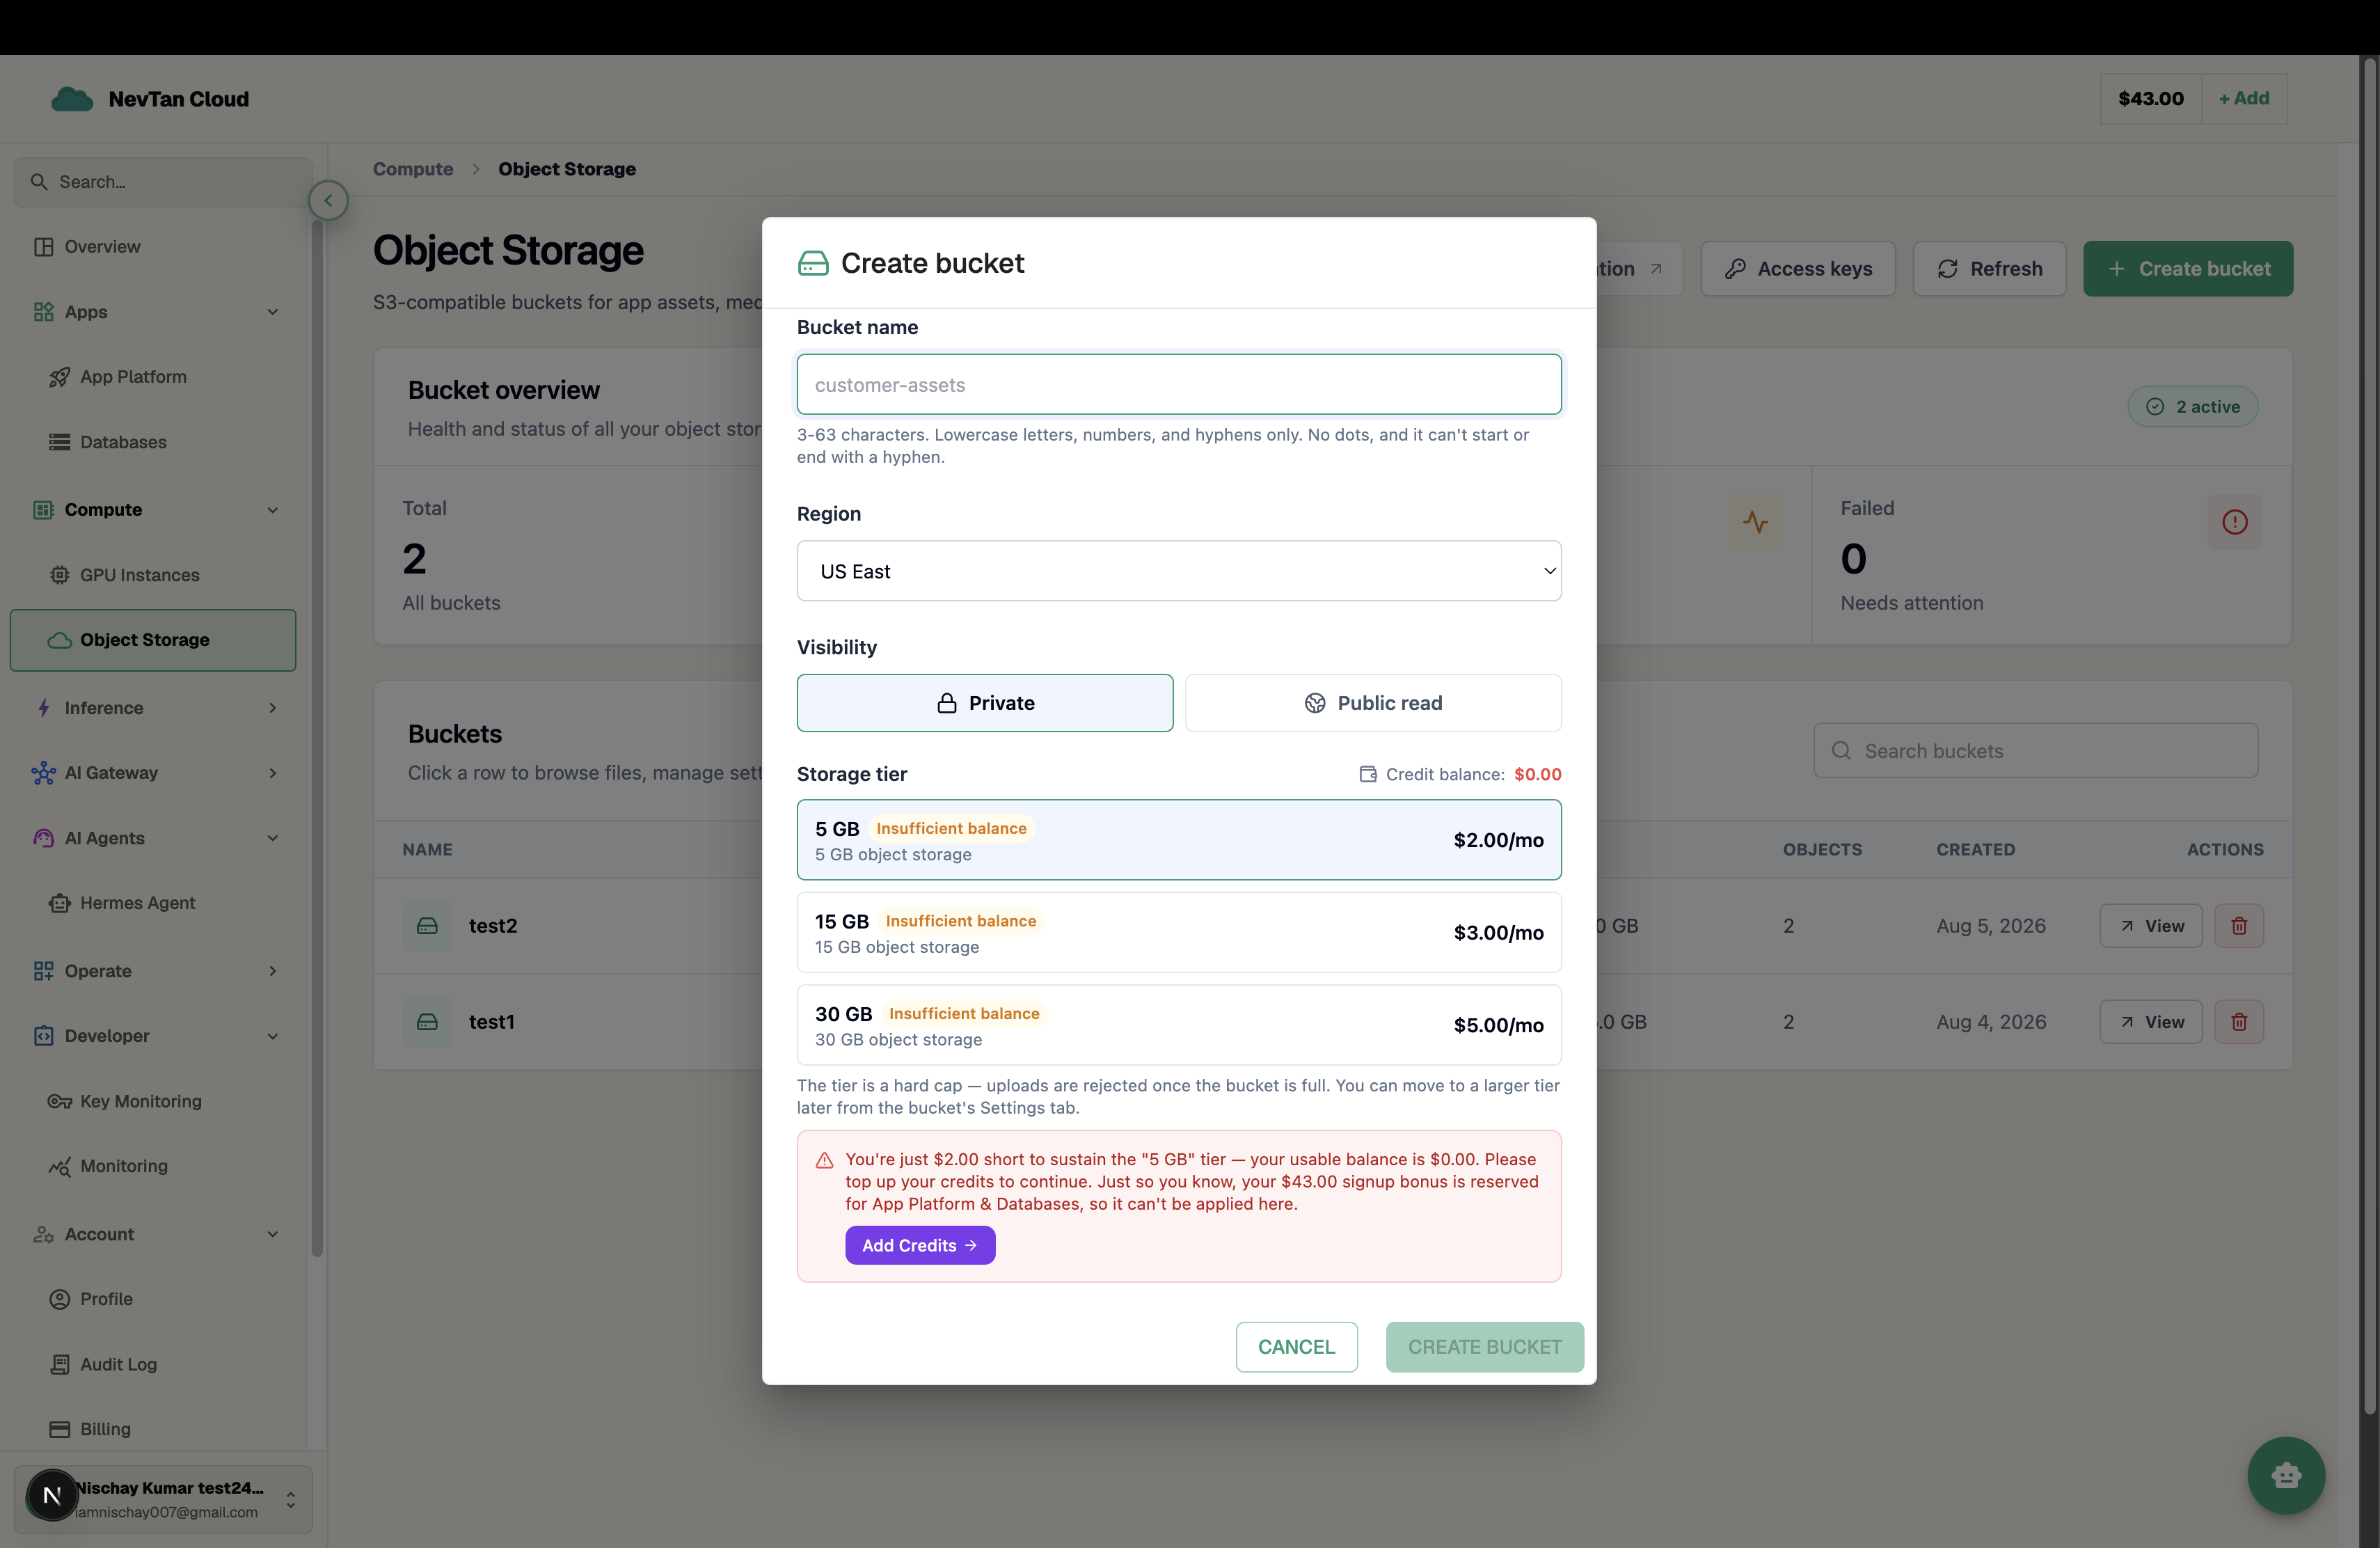
Name, region, visibility, and storage tier — all set here, with a live credit-balance check on each tier. - 5Create itThe bucket appears immediately in status Creating while its storage is provisioned, then flips to Active once ready — usually within a few seconds.
| Parameter | Type | Description |
|---|---|---|
Namerequired | text | Globally unique, lowercase, 3–63 characters, letters/numbers/hyphens only. A handful of reserved words (like www, api, admin) can't be used as a bucket name. |
Regionrequired | select | Where the bucket's storage lives. Fixed once the bucket is created. |
Visibility | select | Private (default) or Public read. Changeable any time from Settings. Public read requires a payment method on file — see Public access. |
Storage tierrequired | select | Sets the bucket's space and monthly price. Changeable any time from Settings — see Tiers. |
Note
You can have up to 25 buckets on your account. Delete ones you no longer need to stay under the limit.
Bucket status
| Status | Meaning |
|---|---|
| Creating | Storage is being provisioned. This is brief — usually a few seconds. |
| Active | Ready for objects and access-key traffic. |
| Suspended | Access is paused — most commonly because a payment couldn't be collected (see Pricing). Nothing stored is deleted; access resumes once resolved. |
| Deleting | The bucket is being torn down after a delete request. |
| Failed | Something went wrong provisioning the bucket. Delete it and try again. |
Delete a bucket
Delete a bucket from the list view or from its own Settings tab, under Danger zone. A bucket that still contains objects is protected by default — you'll need to explicitly confirm a force delete to remove a non-empty bucket in one step, rather than deleting every object first.
Important
Deleting a bucket permanently removes every object, access rule, and configuration in it. This cannot be undone.
What can and can't change later
- Region — fixed for the life of the bucket. To move regions, create a new bucket in the target region and copy objects across with an S3-compatible tool.
- Visibility — change Private ⇄ Public read any time from Settings.
- Storage tier — upgrade or downgrade any time from Settings; see Tiers for what happens if you try to downgrade below what's already stored.